Citibike Key Fob Brain Transplant
UPDATE 12/9/2013:
You can now get a key card directly from Citibike!
UPDATE 8/13/13:
Looks like they’ve changed the way the chip is being installed, so this method will not work for newer FOBs. I’ll post back once I figure out a new good way to get the chips out.
I love CitiBikeNYC but the key fob doesn’t fit into my wallet and I don’t carry keys, so I removed the tiny chip from inside the fob and put it inside my credit card. Now I am much happier and don’t have to carry anything extra around to use CitiBike.
.
It only takes about 5-10 minutes of work.
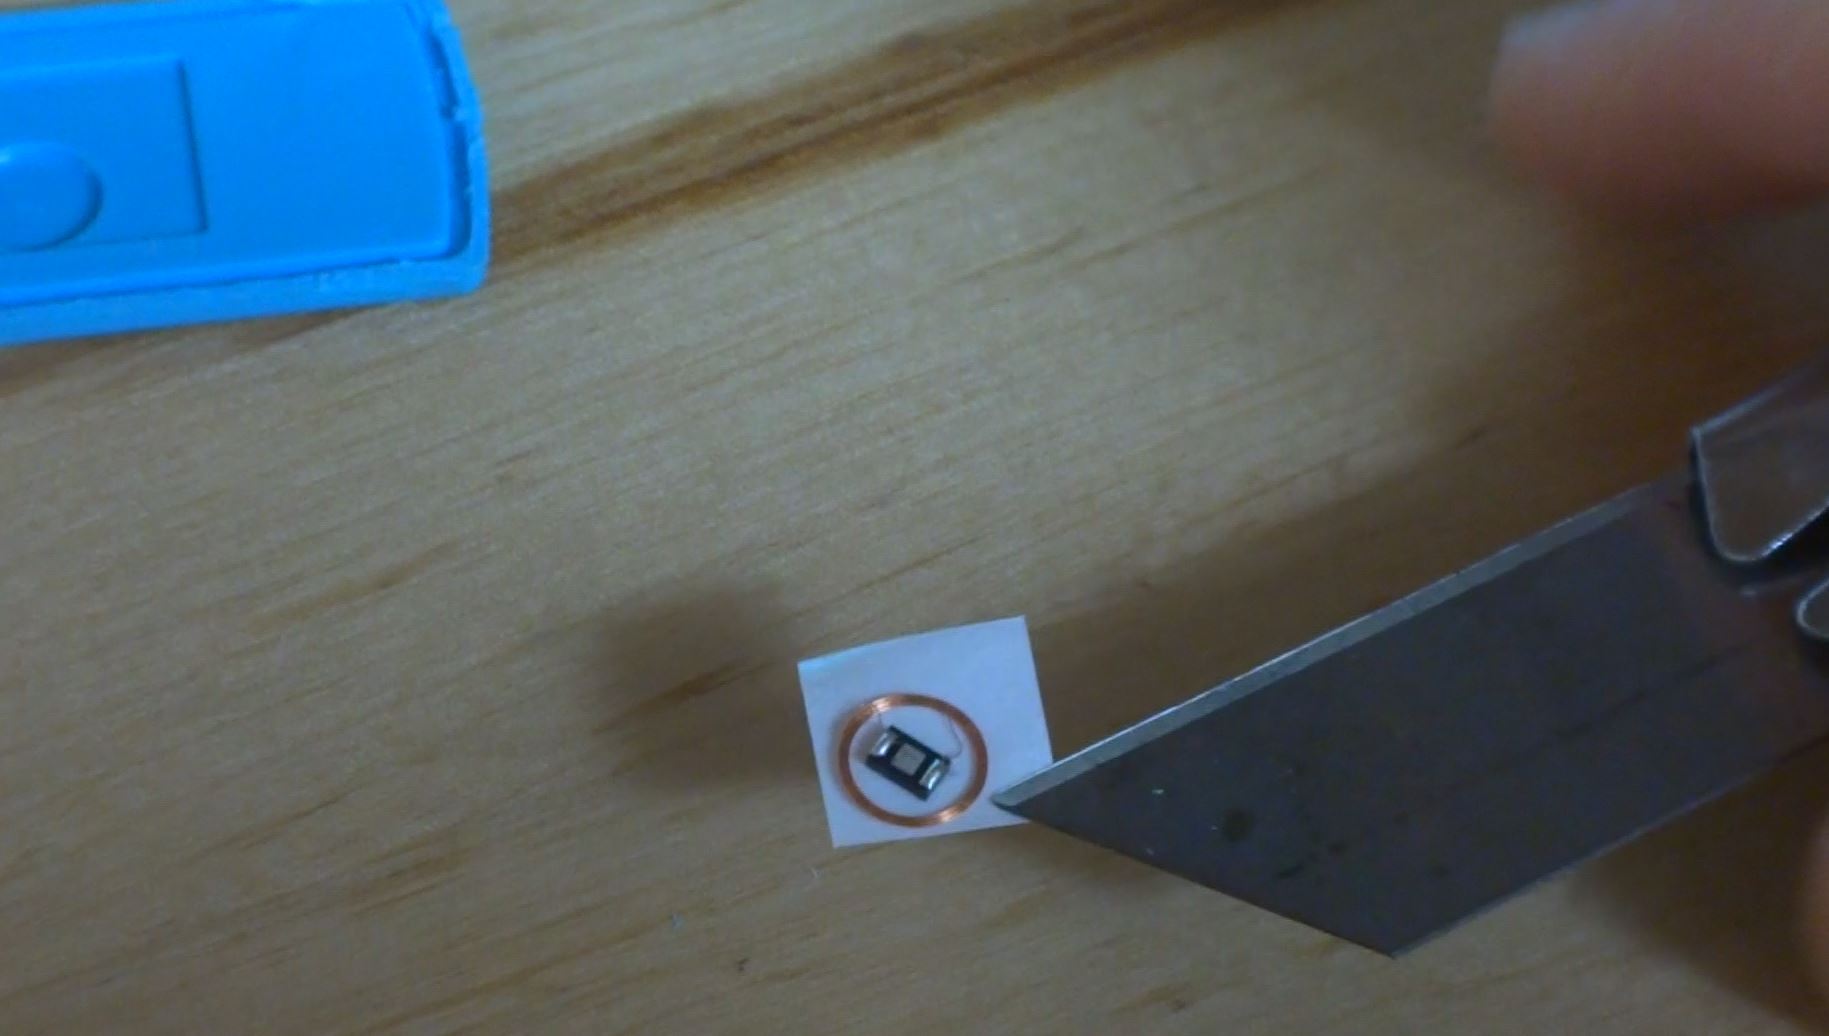
1. Open your key fob using a mat knife. I just carefully kept running the blade across the seem around the edges of the fob, scraping a little plastic out with each pass. After a minute or two I was able to wedge the blade into the crack and pry the halves apart.

2. Carefully take out the square of tape that has the RFID chip stuck to it. Be really careful not to hurt the tiny wires.
3. Drill a hole in the bottom right corner of your credit card (so it will still work. A 3/16th bit is perfect. I sandwiched the card between one half of the fob shell (as a template to locate the hole) and a block of wood. If you also have a larger drill bit too, you can twist it in the hole with your fingers to clean up the sides of the hole.

4. Stick the RFID chip and coil into the hole by sticking the tape to the back of the card.
5. Mix up some epoxy and put a drop of it on top of the RFID chip in the hole to protect it. I used DevCon 5 minute epoxy that I got from the hardware store and it worked great. Mix up more epoxy than you think you’ll need. I used a disposable chopstick and soy sauce tin that came with dinner last night. Don’t be afraid to use the chopstick to smear the drop of epoxy around to make sure it covers the chip and fills in the hole and even spreads out a little over the lip of the hole.

6. Let it sit for maybe an hour to let the epoxy dry, and then go borrow a bike!
You can get all the tools you need for this project at the Seaport Tool Library.
Here is the 6 second version…
any pics of the new key fobs? I just got mine and it looks like the one in your picture.
The difference is on the inside, there is now a big blob of epoxy over the chip so you can’t just take it out like you used to be able to do.
You can! Peel back the barcode sticker with a boxcutter or xacto knife, and roll up the white sticky stuff with your fingers. The squareish chip pops right out! https://i.imgur.com/Ex4jT3a.jpg

those bastards!!